
Category:
Insights
Published On:

Planda Portal Team
Creating Your Location Plan: A Complete Guide
Understanding Location Plans
When submitting a planning application, your Local Authority needs to clearly identify the proposed development site and understand its relationship to surrounding areas. A location plan serves this critical purpose by providing an accurate, scaled map that shows exactly where your project will take place.
Why Location Plans Matter
Local Planning Authorities require location plans to:
Precisely identify the land included in your application
Understand how your development relates to neighbouring properties and infrastructure
Verify site access points and connections to public highways
Ensure all necessary land is included in the application boundary
Planda Portal's location plan tool simplifies this process by guiding you through boundary definition, map generation, and document creation, all within one streamlined workflow.
Understanding Site Boundaries
The Red Line Boundary
Your red line boundary defines the primary development site. This single boundary must encompass:
The main development area
All access routes to public roads
Associated infrastructure (parking areas, driveways, pathways)
Ancillary structures (garages, sheds, outbuildings)
Gardens and outdoor spaces are integral to the development
Important: Regardless of your development type (residential, commercial, or rural) you must clearly show how the site connects to existing road networks and the public highway.
The Blue Line Boundary
Use blue line boundaries to indicate any additional land you own that sits near or adjacent to the development site, even if it's not part of the proposed works. You may have zero, one, or several blue line boundaries depending on your property holdings.
Technical Requirements for Valid Location Plans
Your location plan must meet specific standards to be accepted by Local Planning Authorities:
Scale and Format
Standard metric scale: 1:1250 for typical sites, 1:2500 for larger developments
Document size: A4 or A3
North arrow clearly indicated
Map Content
Site boundaries clearly marked (red line for main site, blue line for additional owned land)
Surrounding context including nearby roads and buildings
All land required for site access highlighted
How to Create Your Site Boundary
Planda Portal offers two options for defining your site boundary, allowing you to choose the approach that best suits your workflow. We currently don't support file upload but it's coming soon!
Option 1: Auto Boundary Selection
The autofill tool automatically detects property boundaries:
Select the autofill tool from the drawing options
The system will highlight the detected boundary
Click within any enclosed areas to include them
Select 'Confirm Site' to confirm
If the result isn't accurate, use 'Reset site' to start over.
Option 2: Free hand Drawing Tool
For precise control over your boundary definition:
Select the freehand drawing tool
Click once at any corner of your site to create the first point
Continue clicking at each corner - each click creates a new point connected by a boundary line
Work around the perimeter until your boundary is complete
Avoid overlapping or duplicating boundary lines
Use 'Reset site' if you need to start fresh.
Reviewing Your Location Plan
Before finalising your location plan, verify it includes:
✓ Complete red line boundary around the main development site
✓ Blue line boundaries around any additional owned land (if applicable)
✓ At minimum: one named road plus a landmark, or ideally two or more named roads
✓ Adequate surrounding context to orient the site
✓ Correct scale appropriate for your site size
Large or Irregular Sites
For sites exceeding 10 hectares or with irregular shapes:
The 1:2500 scale accommodates up to 22 hectares on A4 paper
This larger scale is particularly suited to rural developments and extensive projects
Ensure your boundary remains clear and accurate even at the broader scale
Confirming and Accessing Your Plan
Your Responsibility
You bear responsibility for the accuracy of your boundary definitions. During the review stage, carefully verify that:
All boundaries correctly represent your site
Access points are properly included
Surrounding context is sufficient for Local Authority assessment
If you're uncertain about your plan's suitability, contact your Local Planning Authority before proceeding.
After Submission
You can modify your location plan throughout the application process. Once you've submitted your application, access your location plan anytime from your main applications dashboard.
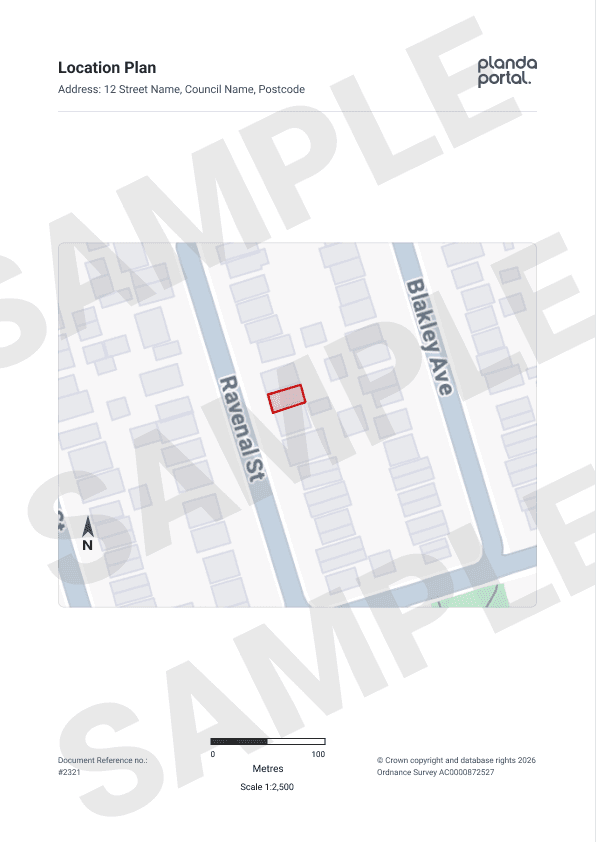
Location Plan Example
Location Plans vs. Site Plans
Important distinction: A location plan shows where your development sits within the broader area. A site plan (or block plan) provides detailed information about what's happening within the site boundaries themselves. These are separate documents serving different purposes in your application.
Ready to Create Your Location Plan?
Ready to create your location plan? When you begin using Planda Portal's boundary tool, you'll see your site marked with a blue pin based on the postcode or grid reference you provided earlier in your application. From there, simply choose your preferred drawing method and follow the steps outlined above.
Need assistance? Your Local Planning Authority can provide guidance on local-level requirements beyond the national standards we've covered here.
Subscribe to our Newsletter!